Well-maintained paint is not only beautiful to look at but also increases the resale value. Polishing the car is therefore one of the most important steps in car care.
We explain the appropriate steps and give tips on the best-rated products and methods for a brilliant result. With a good quality paint polish, the finest abrasives inside gently clean the vehicle surface. They remove fine scratches, and the paint shines again. The high-quality wax contained in a quality paint polish protects the car from future bad weather.
WHY SHOULD YOU USE POLISH ON YOUR CAR?
The goal of car polishing is to make the vehicle’s paint look smooth and shiny again. The top, possibly slightly weathered, layer of paint is finely removed, and a new layer is revealed. This can also remove small scratches on the surface. If you want to polish the car, you need a suitable polish, a polishing sponge and microfiber cloths. The right choice depends on what type of paint it is. Hard wax polishes are particularly suitable for new cars and well-cleaned vehicles. Fine polishes and soft polishing sponges should be used on older cars and more weathered paintwork.
What are the benefits of car polishing?
A regularly polished car appears well-maintained. The polish also ensures that the car retains its value. Freshly treated car paint is more durable and can withstand wind and weather. Even bird droppings can no longer cause damage to the vehicle paint as easily.
POLISHING A CAR: STEP-BY-STEP INSTRUCTIONS
How do you do car polishing at home, and what do you have to consider when choosing a product? When polishing a car, not only the technique but also the right preparation are important. A warm, but not hot, day should be chosen for the polish. However, the car must never be parked in the blazing sun; otherwise, the polish will dry too quickly.
1. WASH THE CAR BEFORE POLISHING
First, you should wash the car thoroughly. A trip to the car wash or to the self-service car wash is equally suitable here. It is important that the paint be thoroughly cleaned. Before polishing, you should always walk around the vehicle again. Particularly stubborn dirt can be removed gently using cleaning clay. Even small particles of dirt can cause scratches while polishing the vehicle.
Before you start polishing, all plastic parts of the car should be thoroughly masked. The same applies to the headlights. Otherwise, it can happen that a difficult-to-dissolve.
2. POLISH THE CAR BY HAND
When polishing by hand, inexperienced car owners can more easily feel whether the pressure applied is correct. Polishing is possible with a suitable polishing sponge, such as the hand polishing sponge set, which is very easy to handle with its ergonomic handle.
Always apply the polishing agent to the sponge, never directly to the paint.
Work from component to component. Small circles with light pressure are recommended for beginners to move on the surface.
Alternatively, the so-called cross stitch produces top results. The polishing pad is first moved straight and then across in small movements. In this way, remove small scratches and the top layer of paint. If the polish becomes transparent, the abrasive particles have completely broken down.
Remove any remaining polish with a microfiber cloth.
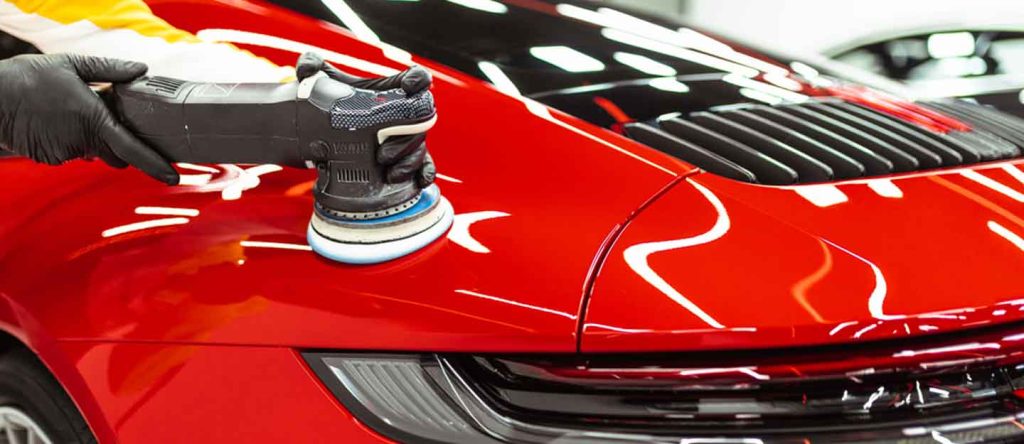
3. POLISH THE CAR WITH THE MACHINE
There are advantages and disadvantages to working with a polishing machine compared to polishing by hand. On the one hand, it makes incorporating the polishing agent much quicker and is therefore suitable for large areas. It also produces better results, but if handled incorrectly, the machines can cause unsightly damage to the paint. For newcomers to this field, a rotary machine such as the cordless polishing machine is an excellent choice.
4. SEAL CAR PAINT
Then the finish takes place. The paint is treated with a special hard wax or a polymer sealant. In this way, the freshly treated and partially removed paint is sealed, and the shine lasts longer. For the finish, you should also polish in circular movements. Important: The wax is applied with a clean cloth, and be sure to avoid the headlights and unpainted plastics.